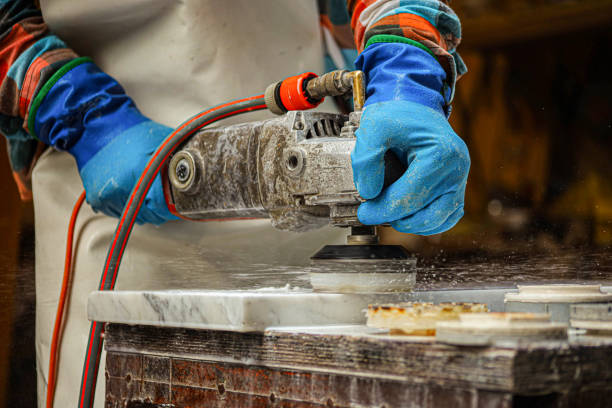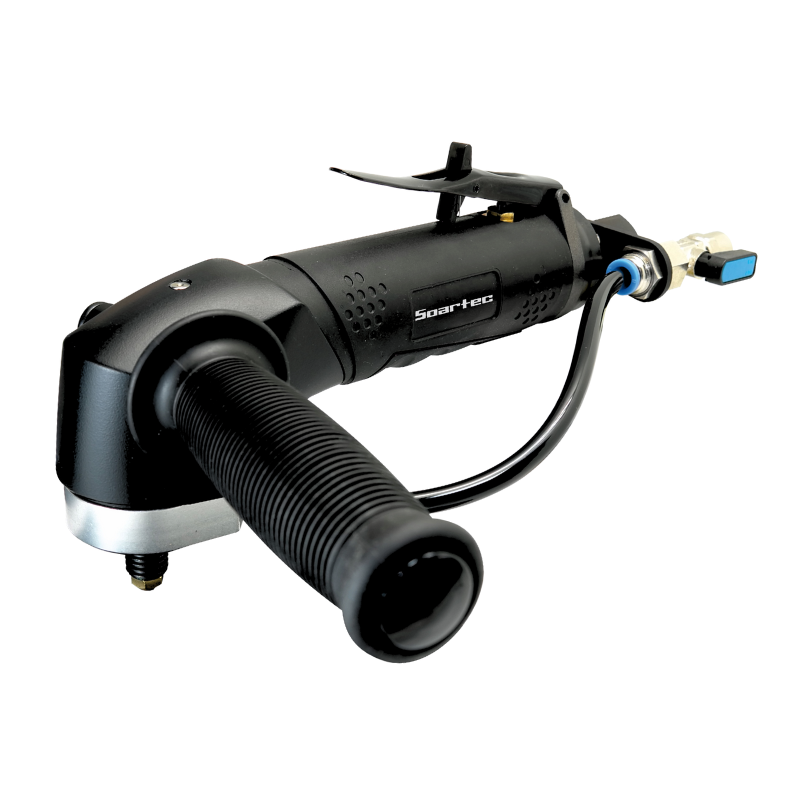
In the realm of precision craftsmanship and meticulous surface finishing, mastering how to polish rocks on stone tiles represents a harmonious blend of art and skill. This process not only enhances the aesthetic appeal of the stones but also preserves their natural beauty for years to come. The utilization of Air water sanders, particularly the variants such as the random orbital sander 5 inch, random orbital sander 6 inch, and random orbital sander 3 inch, has revolutionized the approach towards achieving a flawless finish. These tools, adept at removing scratches and facilitating wet polishing, have made granite polishing and general polishing of rocks a more efficient and less labor-intensive task.
This article is intended to serve as a comprehensive guide, outlining the strategic use of air water sanders for stone tiles. Initially, it delves into the reasons why choosing air water sanders, with a specific focus on orbital sanders of various sizes, is advantageous for such precise work. Following this, a detailed, step-by-step guide illuminates the specific techniques and methods for utilizing these sanders to their full potential. To further refine the process, additional sections will offer tips for achieving the best results, including advanced strategies to enhance efficiency and effectiveness in the polishing process. By navigating through these insights, readers will gain a robust understanding of both the foundational and intricate aspects of polishing rocks on stone tiles, paving the way for superior craftsmanship.
Why Choose Air Water Sanders for Stone Tiles
Air water sanders, particularly those designed for industrial use, offer significant advantages when polishing stone tiles, a task that demands precision and control. These tools are robust, built to handle extensive workloads without compromising performance. Their compact and lightweight design ensures smooth operation, allowing for meticulous control essential for achieving a flawless finish on stone surfaces.
Precision and Control
The design of air water sanders facilitates precise handling, which is crucial when working with delicate stone tiles. They often feature adjustable speed settings and anti-vibration technology, enhancing the user’s ability to perform precise sanding without causing damage to the tiles. The type of sanding plate and the size of the orbit can be chosen based on the specific requirements of the stone tile, ensuring optimal contact and effectiveness.
Minimizing Dust and Debris
One of the standout features of air water sanders is their ability to minimize dust and debris, which is particularly important in the context of stone tile polishing. These sanders can be equipped with dust extraction systems, such as built-in dust ports that connect to dust collectors or shop vacuums. This integration not only maintains a cleaner working environment but also protects the quality of the tile surface from being marred by accumulated dust.
Enhancing Tile Durability
Using air water sanders for stone tiles not only enhances their aesthetic appeal but also contributes to their longevity. The gentle yet effective polishing process does not overly stress the stone, helping to preserve its natural structure and resistance to wear. Additionally, the even finish provided by these sanders can help in applying sealers more effectively, which further protects the tiles from stains and weathering, thus extending their life.
In conclusion, air water sanders are an exemplary choice for those seeking to achieve professional-quality results in stone tile polishing. Their design tailored for precision, combined with features that ensure a clean and durable finish, makes them indispensable tools in the field of stone care and maintenance.
Step-by-Step Guide to Using Air Water Sanders
Preparing the Stone Surface
Before initiating the polishing process, it is crucial to ensure the stone surface is meticulously prepared. Begin by mopping the floor to remove all accumulated dirt, oil, and debris from the tile pores. This step is vital as it prevents any abrasive materials from causing scratches during the polishing process. Additionally, ensure the workspace is well-ventilated and all necessary safety measures, such as wearing protective glasses, are in place to maintain a safe working environment.
Attaching the Polishing Pads
To set up the air water sander, start by attaching the appropriate backer pad or adapter to the spindle of the sander. This should be done using the spanner wrench provided, ensuring it is hand-tightened to secure the pad effectively. Next, attach the chosen polishing pad or accessory. It’s important to select the correct pad and compound based on the type of stone being polished, as this will affect the efficiency and outcome of the polishing process.
Using the Sander
Once the polishing pads are securely attached, grip the sander body while holding the switch lock forward and press the switch lever down to activate the tool. Begin the polishing by moving the sander in smooth, even strokes across the stone surface. Adjust the air regulator valve to control the airflow from zero to maximum as needed. Make sure to turn the sander off during any breaks in the polishing process or when changing discs. Always handle the polisher with care to avoid any damage to the stone tiles.
Cleaning and Inspecting the Tiles
After completing the polishing, turn off the sander and disconnect the air hose. Use a wet vac to suction up any remaining water and debris from the surface. This step not only cleans the tiles but also allows for a clear inspection of the polishing quality. Check for any missed spots or uneven finishes, and if necessary, repeat the polishing process with adjusted settings or different pads to achieve the desired smoothness and shine on the stone tiles.
Tips for Achieving the Best Results
To ensure optimal results when polishing stone tiles with air water sanders, consider the following essential practices:
Using the Right Grit
Selecting the appropriate grit level is crucial for achieving the desired finish on stone surfaces. Start with a coarse grit if significant surface correction is required, typically around 60-150 grit for removing deep scratches or imperfections. Progress to medium grits (200-400) to refine the surface further, and finish with fine grits (500-800) to prepare for the final polishing stage. For a high-gloss finish, very fine grits (1000-1500+) are recommended. Always ensure that the entire sequence of grits is followed meticulously to avoid uneven surfaces and to enhance the stone’s natural beauty.
Maintaining Consistent Pressure
Consistency in applying pressure is key to preventing swirl marks and uneven sanding. The air pressure from the compressor should ideally be set at 90 PSI to allow the sander to operate at optimal rotations per minute (RPM). For random orbital sanders, maintaining 12,000 RPM for standard sizes and 10,000 RPM for smaller sanders ensures a smooth, consistent finish. If multiple tools are used simultaneously, adjust the compressor settings to maintain adequate pressure for each tool. Regular checks and adjustments to the sander’s speed can prevent a decrease in performance and quality of the finish.
Frequent Inspection
Regularly inspecting the equipment and the workpiece during the sanding process can significantly enhance the outcome. Check for signs of wear or damage on the backup pads, especially on vinyl face pads and hook face pads. Clear adhesive residues and replace pads if hooks have straightened out to ensure proper attachment of sanding discs. Additionally, lubricating the sander daily with a few drops of machine oil in the air intake area helps in maintaining the internal mechanism, preventing the sander from locking up due to dry or dislodged vanes.
By adhering to these guidelines, operators can achieve professional-quality results while extending the lifespan of both their tools and the stone tiles they are working on.
Advanced Tips and Techniques
Achieving Different Finishes
Natural stones come in a myriad of finishes, each suited to specific applications and aesthetic preferences. For instance, a natural split finish retains the stone’s raw, textured appearance, ideal for outdoor settings where a rugged look is desired. This finish requires sealing to protect against the elements. Conversely, for a more refined texture, a sandblasted finish employs high-velocity particles to etch the stone’s surface, subtly lightening its color and providing a uniform matte texture. For areas requiring slip resistance, such as outdoor pavers, a flamed finish is advantageous as the high heat treatment enhances the stone’s texture and slip-resistance.
Handling Complex Patterns and Shapes
When working with intricate tile patterns or irregular shapes, precision in layout and cutting is paramount. Techniques such as using a wet saw to create beveled edges on cut tiles help match factory edges, reducing the risk of chipping. For complex patterns like the chevron or Versailles, careful measurement and cutting are required to ensure that each piece fits perfectly without excessive waste. Employing layout techniques that consider the room’s dimensions and the tile size can significantly impact the overall aesthetic and functional quality of the installation.
Troubleshooting Common Issues
During the polishing or installation process, several issues may arise that require meticulous attention to detail to resolve. For instance, if during the polishing process deeper scratches are revealed at higher grits, one may need to revert to a coarser grit to remove them effectively. This step is crucial to avoid compromising the finish quality. Additionally, when laying tiles, ensuring the substrate is level and adequately prepared is vital to prevent issues like cracking or poor adhesion. Regular inspections and using the correct tools and materials, such as the appropriate adhesives and grouts, are essential for both the longevity and aesthetics of the stone or tile installation.

Conclusion
Throughout this article, we have explored the intricacies of polishing rocks on stone tiles using air water sanders, emphasizing their indispensable role in achieving a flawless finish. We’ve navigated through the advantages of using air water sanders, outlined a detailed step-by-step guide for their use, and shared both foundational and advanced tips to ensure superior results. This journey underscores the fusion of technique and precision necessary to enhance the beauty and longevity of stone tiles, reflecting a meticulous process that transforms the ordinary into the extraordinary.
The insights provided here serve not only as a guide but also as an invitation to elevate craftsmanship in stone tile polishing. By adopting the methodologies and practices detailed, enthusiasts and professionals alike can ensure that their work not only meets but exceeds expectations. The broader implications of this craft extend beyond the immediate aesthetic, influencing the preservation and appreciation of natural materials in our environments. As we conclude, let this article inspire a commitment to excellence and a continued exploration of the art and science behind stone tile polishing, encouraging further innovation and mastery in the field.
To read more about water sander:
How To Use a Water Sander on Fiberglass Surfaces?
Top 10 Benefits of Using a Water Sander on Metal Surfaces
FAQs
Can a sander be used to polish rocks?
Yes, a sander can be utilized to polish rocks effectively.
What is the process to polish rock stones?
To polish rock stones, begin by dipping the stone in water. Smooth the stone using 160 grit and then 360 grit sandpaper. For an alternative approach, you can use a tumbler to polish the stones. After sanding, buff the stones with powdered polish and wipe them down using a strip of leather. Finally, apply rouge to enhance the stone’s polished appearance.
How can you make rough stones appear shiny?
To make rough stones shine, start by wrapping a clean cloth around a chopping board. Place a small amount of polish in the center of the board. Firmly hold your stone and rub its sides against the polish on the board, repeating this process until the entire stone has been polished.
What product can be sprayed on stone to enhance its shine?
To make stone shine, use a Stone Polish Spray With Sealer. This product is typically available in an 11-ounce aerosol can, specially formulated to enhance the natural colors of the stone. Lustro Italiano stone polish not only adds a vibrant polish but also includes a sealer for added protection.

